Make holiday decorating a fun family affair by giving your kids their own Christmas tree. Let them express their innate creativity through handmade ornaments that add a heartwarming spin to popular holiday themes.
To help you get started, brand ambassador Jennifer Lutz shows three decorating themes and DIY ornament ideas for kids Christmas trees:
Jennifer Lutz: Hi, I’m Jennifer with Balsam Hill. The holidays are here. Today I’m going to share with you some of my favorite tips for creating kids themed trees.
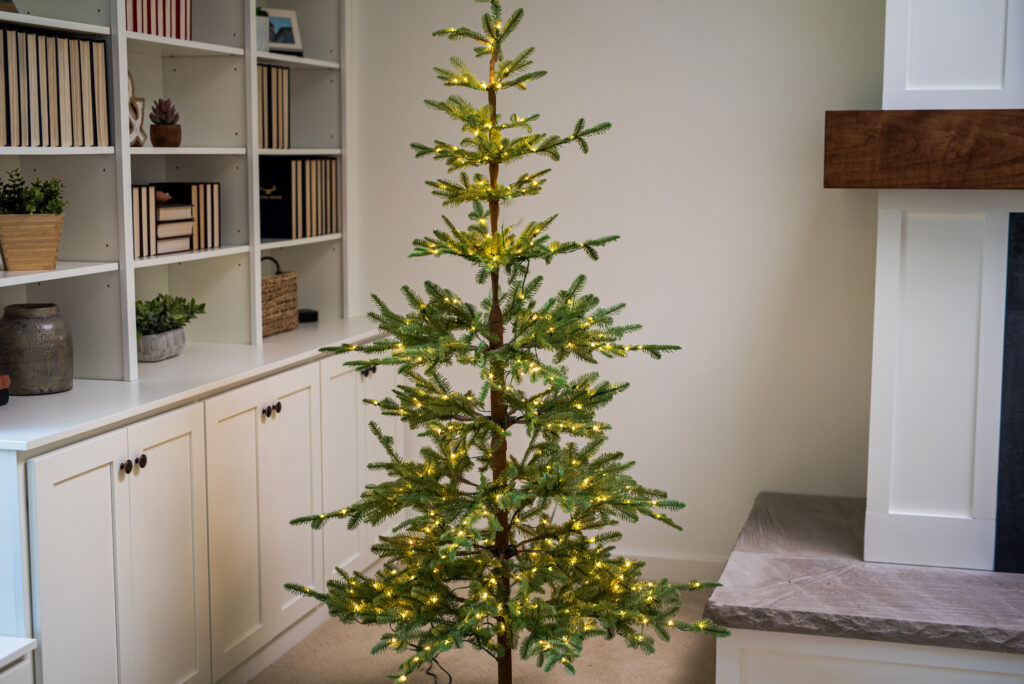
I have a six-and-a-half foot Alpine Balsam Fir with me today and we’re going to do three different things: a farmhouse theme, a whimsical theme tree and a classic kid’s tree.
Let’s get started. With the first tree, we’re going to start with the farmhouse-themed Christmas tree. I love a farmhouse tree because it’s rustic and homey. I also found some really fun simple crafts and ornaments that I could do with the kids.
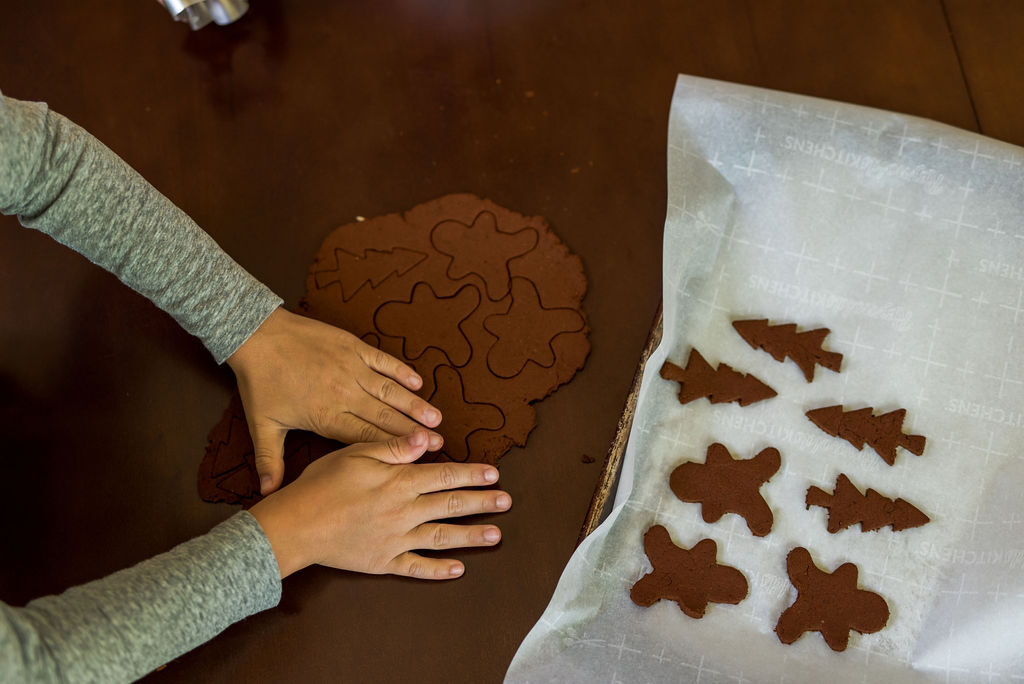
To create a farmhouse look, I made cinnamon applesauce cutout ornaments and dried citrus ornaments. My kids love to work with dough and make cutouts. Honestly, with four ingredients, the cinnamon applesauce dough takes a minute to prep.
They also coordinate beautifully with Balsam Hill’s farmhouse themed ornaments, garland, and ribbon. I think mixing homemade ornaments along with coordinated bulbs creates an elevated tree.
Here’s what you need: one cup of cinnamon, 3/4 cup of applesauce, two tablespoons of basic white glue, one tablespoon of ground cloves or nutmeg, straw to create a hole to hang ornaments, ribbon or jute to hang ornaments.
To make dough, mix together ingredients. Roll out dough to a quarter-inch thick. Press ornaments with your favorite holiday cookie cutter. Use a small straw or skewer to make a hole at the top of the ornament for ribbon.
Preheat oven to 200°F and bake a parchment-lined cookie sheet for two hours. If you have a bit of extra time, you can also dry them overnight. Finally, string with your favorite ribbon and hang.
For dried citrus fruit ornaments, here’s what you need: oranges and grapefruit, cutting board and knife, baking sheet, parchment paper, ribbon or jute to hang ornaments.
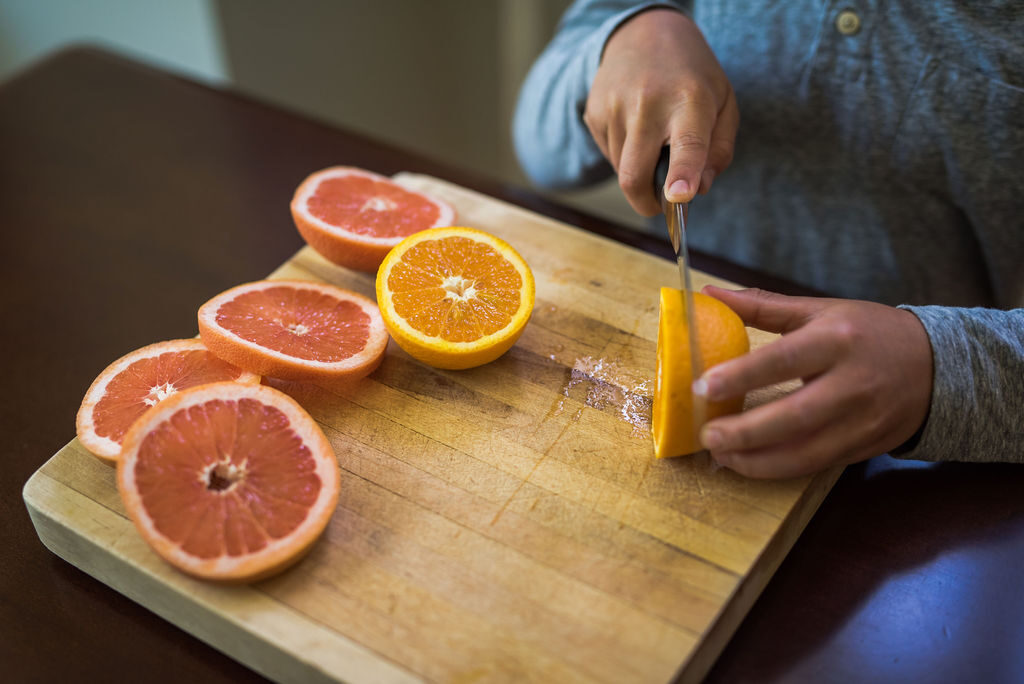
Slice fruit a quarter-inch. Lay on a parchment-lined sheet pan and dry it 200°F for about two to three hours. Of course, everyone’s ovens are slightly different so I suggest turning fruit every 30 minutes or so to help the drying process and to make sure the fruit doesn’t brown.
You’ve created and crafted, now it’s time to decorate. My most important advice before you start decorating, take the time to fluff that tree.
Once it’s fluffed, I paired my apple cinnamon cutouts and citrus slice ornaments with Balsam Hill’s farmhouse ornament collection. I chose the four-inch farmhouse Christmas ribbon, the country Christmas garland, and large berry picks. To decorate, I like to place the largest decor items first.
The farmhouse ribbon is four inches in width and substantial. After assembling and fluffing, I added the ribbon which I worked in a diagonal direction around the tree followed by large red berry picks.
Next, I added the country Christmas garland, spaced between the ribbon, wrapping it around and around the tree in a slight downward spiral. Finally, I added the cinnamon cutouts and citrus slices. Again, trying to equally disperse throughout the tree and varying the colors and sizes.
For our second tree, I went with the whimsical theme because what kid doesn’t love color and painting? For this themed tree, I combined both. For a whimsical tree, think fun bright colors.
To decorate this tree, I purchased wooden shapes, oversized letters, and primary color acrylic paint and brushes. I paired these with a festive beaded gold ornament set from Balsam Hill.
Here’s what you need, assorted blocks in a variety of shapes and sizes, wooden letters, acrylic paints, plastic cups for paint, paintbrushes, eye-hooks, and a drill with a small drill bit to screw in eye hooks on the corners. Also use ribbon, jute, or ornament hooks for hanging ornaments.
Set up a painting station with a drop cloth, painter’s palette, your favorite paint, and assorted brushes. Our kids pick their favorite colors for their monogram ornaments, and then we just mixed and matched primary colors on the wooden blocks. After your painted ornaments have dried, screw the eye hooks on the corner of each block and hang with ribbon ornament hooks.
For the whimsical tree, I began with felted garland followed by large oversized painted letters, Balsam Hill’s beaded gold ornaments set to add a little sparkle, and finally, the painted shapes.
I start with larger ornaments making sure that I hang at least one per section and that the tree looks balanced. Meaning not too many of the same size and type of ornaments clustered in one section.
I often step back to look at the tree checking for holes that need to be fluffed or filled with an ornament. Definitely vary ornament placement. Don’t just hang ornaments on the tips of branches but hang on the interior branches as well. It’s a great way to add depth and fill the holes.
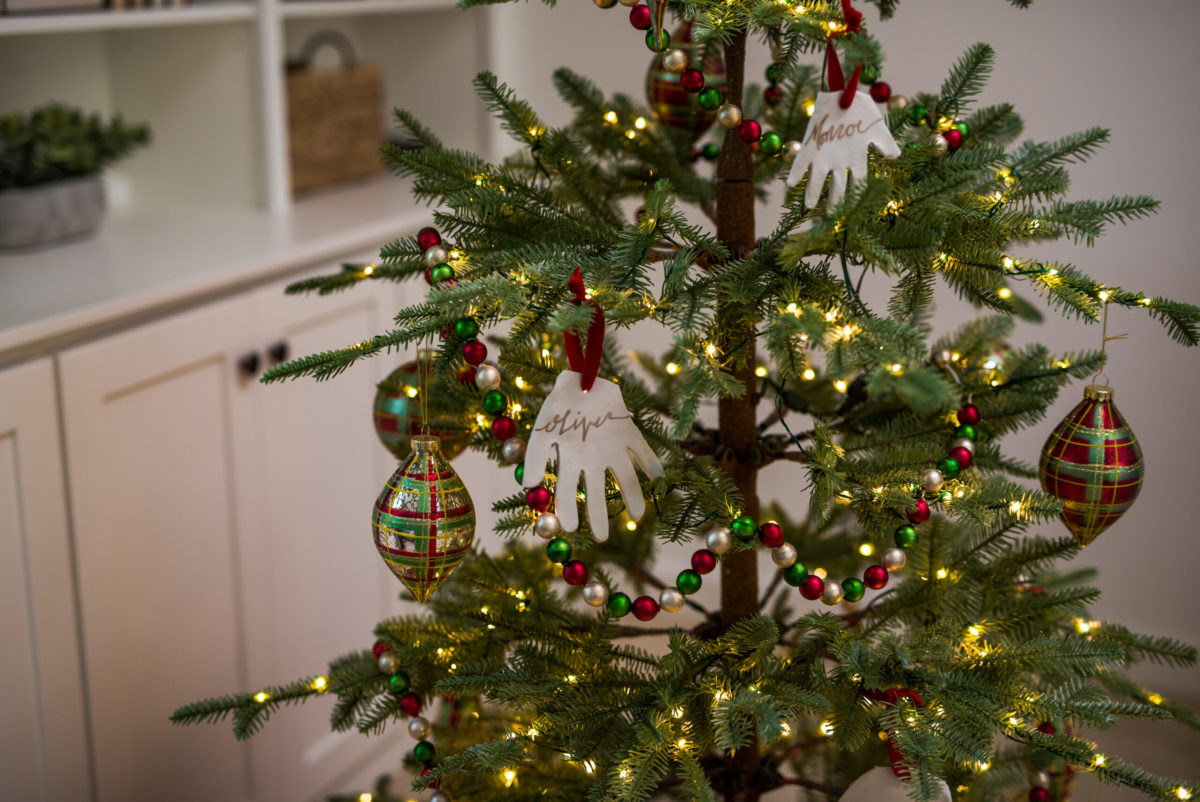
For our last tree, I went with the classic theme that includes the sentimental handprint ornament. The classic kid’s tree beautifully commemorates your growing family with clay handprint ornaments.
To create a cohesive sophisticated tree, I paired handmade ornaments with Balsam Hill’s classic plaid bulbs, their red and cream peppermint tree skirt, and glass beaded garland.
Here’s what you’ll need: natural self-hardening clay, traced handprints, a butter knife, straw to create a hole to hang ornaments, ribbon, twine, or an ornament hook. Start with natural self-hardening clay.
Roll the clay a quarter-inch thick. Trace your child’s hand under the paper and cut out a template to trace onto the rolled out clay. Finally, create a hole for ribbon with a straw and dry the cutout ornament overnight.
For the classic kid’s tree, I started with Balsam Hill’s jeweled beaded garland, then I added their lovely oversized plaid ornaments and finally finished the tree with the family handprints.
The inspiration for this tree was pulling together elements that celebrate family, the passing of time, and the timeless design. The creamy white handprints velvet ribbon pair beautifully with the classic plaid ornaments, beaded glass garlands, and red and white peppermint tree skirt from Balsam Hill.
As I’ve suggested throughout the decorating process, step back from the tree to look at your progress. It helps to spot holes in the tree and places you may have placed too many of the same sized ornaments. Hopefully, these tree ideas create fun family memories while keeping your tree festive and sophisticated. Happy holidays from Balsam Hill.
Farmhouse Christmas Tree

What You’ll Need
Christmas Tree and Decorations:
- 6.5′ pre-lit Alpine Balsam Fir Christmas Tree
- 10-yd Farmhouse Brown Christmas Tree Ribbon
- 5.5′ Country Christmas Garland
- 12 Large Red Berry Christmas Picks
Materials for DIY Cinnamon Applesauce Cutout Ornaments:
- 1 cup of cinnamon
- 3/4 cup of applesauce
- 2 tablespoons of basic white glue
- 1 tablespoon of ground cloves or nutmeg
- Straw or skewer
- Ribbon or jute string to hang ornaments
Materials for DIY Dried Citrus Ornaments:
- Oranges and grapefruit
- Cutting board and knife
- Baking sheet
- Parchment paper
- Ribbon or jute string to hang ornaments
How to Decorate a Farmhouse Christmas Tree
Step 1: Make cinnamon applesauce cutout ornaments


- Mix cinnamon, applesauce, glue, and cloves to create your dough.
- Roll out the dough to a quarter-inch thick.
- Use holiday cookie cutters to create ornament shapes.
- With a straw, punch a hole at the top of each ornament for the ribbon.
- Preheat oven to 200°F and bake the cutouts for two hours, or dry them overnight.
- String your ribbon on the ornament for hanging.
Step 2: Create dried citrus ornaments


- Slice oranges and grapefruit a quarter-inch thick.
- Lay slices on a parchment-lined sheet pan.
- Dry them at 200°F for two to three hours, turning the slices every 30 minutes so they dry evenly.
Step 3: Add your Christmas tree decorations

- Fluff your Christmas tree before you start decorating.
- Place the largest decorations first.
- Add your ribbons, garlands, and picks.
- Finally, hang the cinnamon cutouts and citrus slices, distributing them evenly throughout the tree.
Whimsical Christmas Tree

What You’ll Need
Christmas Tree and Decorations:
- 6.5′ Alpine Balsam Fir Christmas Tree
- 8 Pom Pom Winter Wishes Ornaments
- 6 Beaded Gold Grand Forest Ornaments
- Colored Felt Ball Garland
Materials for DIY Wooden Block and Letter Ornaments:
- Wooden blocks in assorted shapes
- Oversized wooden letters
- Acrylic paints
- Plastic cups
- Paintbrushes
- Eye hooks and a drill to screw into the blocks and letters
- Ribbon, jute, or ornament hooks
How to Decorate a Whimsical Christmas Tree
Step 1: Set up an ornament painting station


- Create a painting station with a cloth-covered table and kid-friendly painting materials.
- Let your kids paint the wooden blocks and letters. Set aside to dry.
- Once dry, screw in eye hooks to each ornament.
- Add ribbon to the ornaments for hanging.
Step 2: Hang decorations on your Christmas tree

- Wrap the felt ball garland around your tree.
- Hang the oversized letters. Place at least one oversized ornament per section of your tree for a balanced look.
- For added sparkle, dress your tree with beaded gold ornaments.
- Hang the painted blocks and shapes as a final touch. Avoid clustering the same size and type of ornaments in one section.
Tip: A great way to bring depth and fill gaps in your tree is to hang ornaments near the trunk and not just on the branch tips.
Classic Christmas Tree

What You’ll Need
Christmas Tree and Decorations:
- 6.5′ Alpine Balsam Fir Christmas Tree
- 60″ Peppermint Tree Skirt
- 6′ Classic Vintage Beaded Garland
- 12 Plaid Christmas Cabin Ornaments
Materials for DIY Handprint Clay Ornaments:
- Natural self-hardening clay
- Traced handprint cutout templates
- Butter knife
- Straw or skewer
- Ribbon, twine, or ornament hook
How to Decorate a Classic Christmas Tree
Step 1: Create handprint clay ornaments


- Roll the clay a quarter-inch thick.
- Place your kids’ handprint cutout on the clay. With a butter knife, cut out a hand-shaped ornament.
- Use a straw to make a hole on each ornament for the ribbon. Let ornaments dry overnight.
- Add ribbon to each ornament for hanging.
Step 2: Decorate your Christmas tree with classic accents

- Start with your beaded garland.
- Hang oversized plaid ornaments and handprint ornaments.
- Throughout the process, step back to check if the decorations are spread out evenly or if there are any gaps and irregular placements.
- Place your Christmas tree skirt to cover the base of the tree.
Safety Tips for Decorating with Kids

1. Pick the Right Christmas Tree Height
Choose a small Christmas tree that your kids can reach without needing a ladder. Tree heights ranging from 4 to 6.5 feet are ideal as a secondary centerpiece for young ones to decorate. Learn more in our Christmas tree sizing guide.
2. Maintain Adult Supervision
If you have a taller tree, help your kids hang ornaments in places they can’t reach. Assist them closely during the DIY process, especially while handling sharp objects and small parts or working with heat.
Create wonderful holiday memories with your kids through these fun Christmas tree decorating ideas. Visit our guide for more tips and browse our gallery to get additional styling inspirations for your tree.


