Decorating a Christmas tree can seem quite intimidating to some, especially when it comes to applying more complicated embellishments such as ribbon.
But decorating your tree doesn’t have to be difficult. Today, I’m going to take you step-by-step through the decorating process so you can create a beautiful designer-looking Christmas tree in your own home!
Pick A Color Scheme and Theme
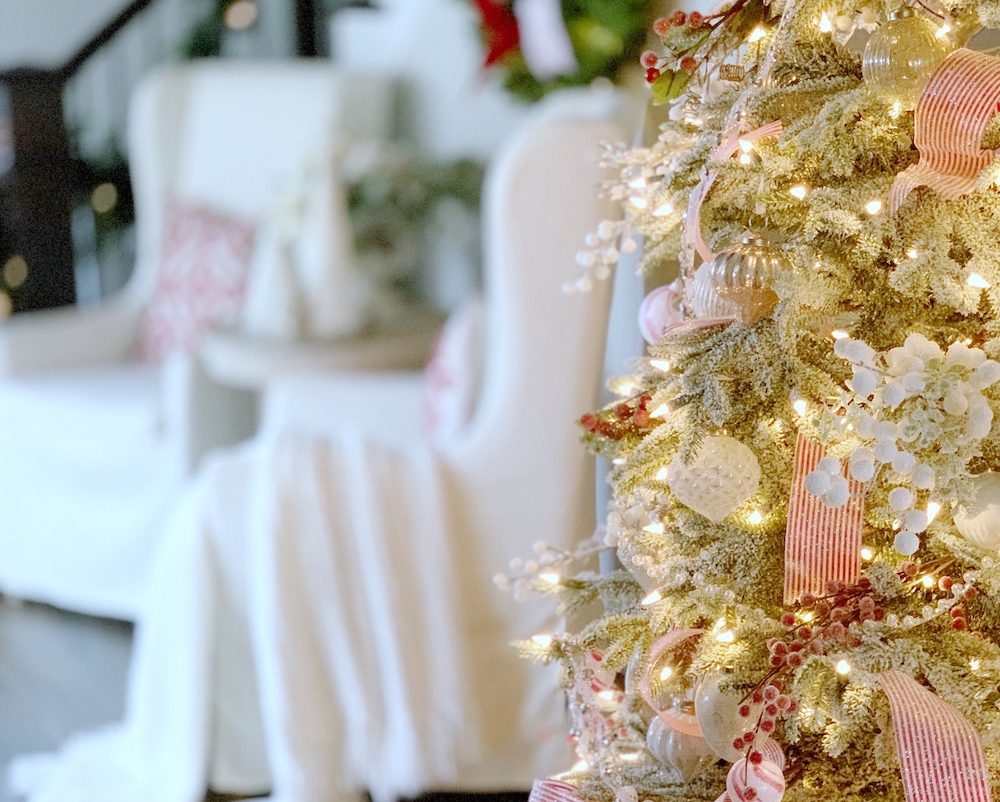
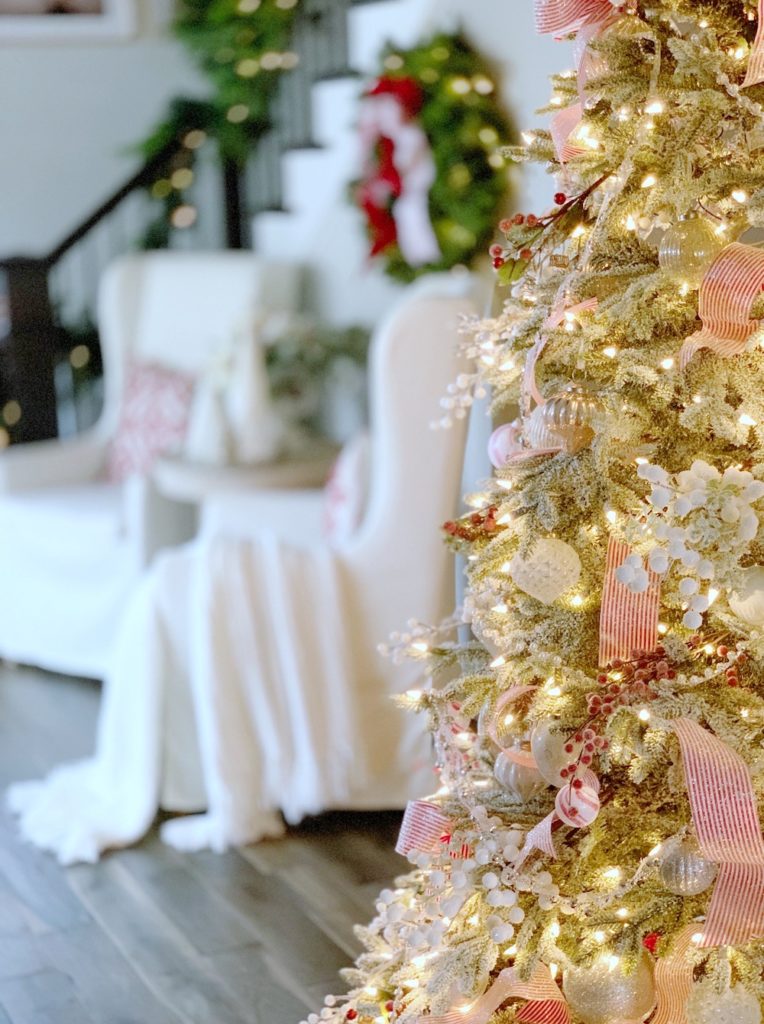
The first step to decorate a Christmas tree is to pick a theme and color scheme. For my entryway tree, which is the Balsam Hill Frosted Fraser Fir – 7.5′, I wanted to have a very bright and cheerful look since it’s the first space people see when they come into my home. So I chose a white and red color scheme and planned to use a lot of beautiful silver French Country ornaments and red and white ribbon for the pop of color!
Attach the Largest Ornaments First
I attach the largest of my Christmas ornaments on my tree first. I used the jumbo-sized French country ornaments from Balsam Hill. Since these large ornaments take up so much room, it makes sense to put them on first! When I attach an ornament, I try to get the ornament to fit closely against the tree branch. I don’t want these large ornaments hanging down too much as they would get in the way of other decorations.
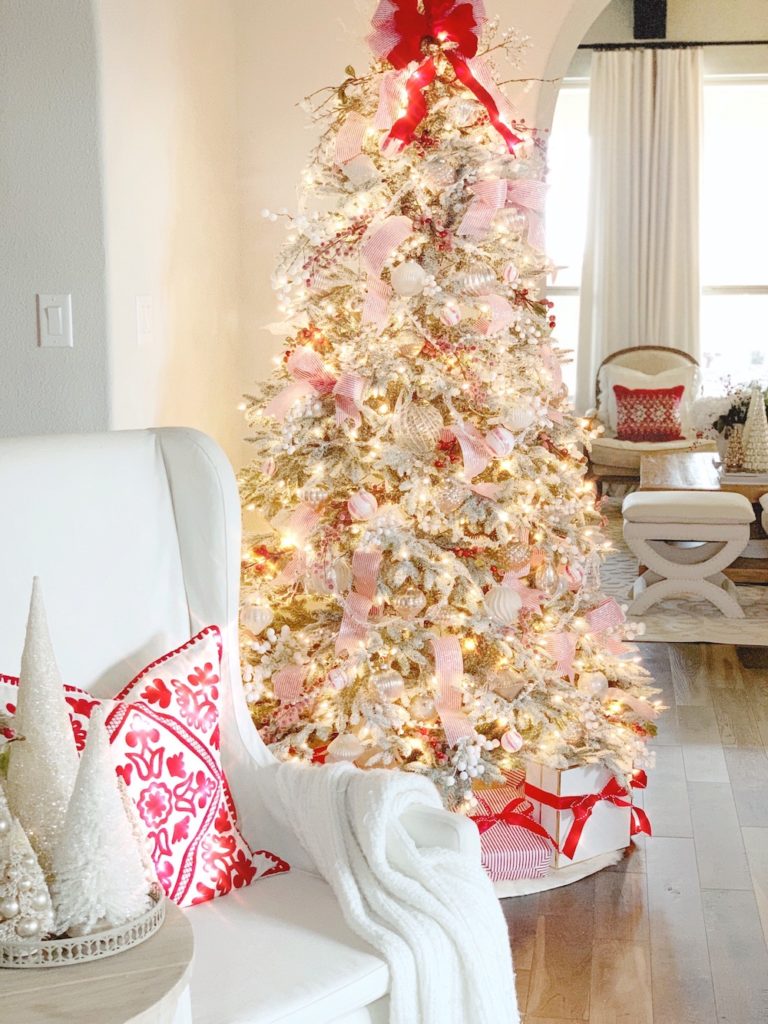
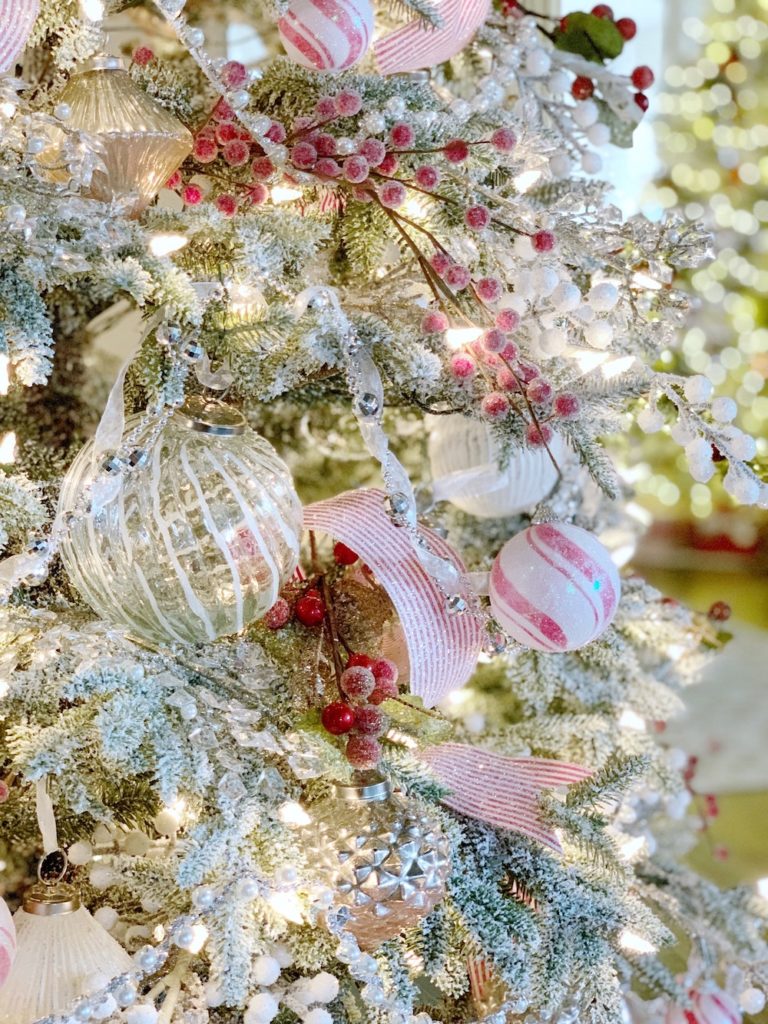
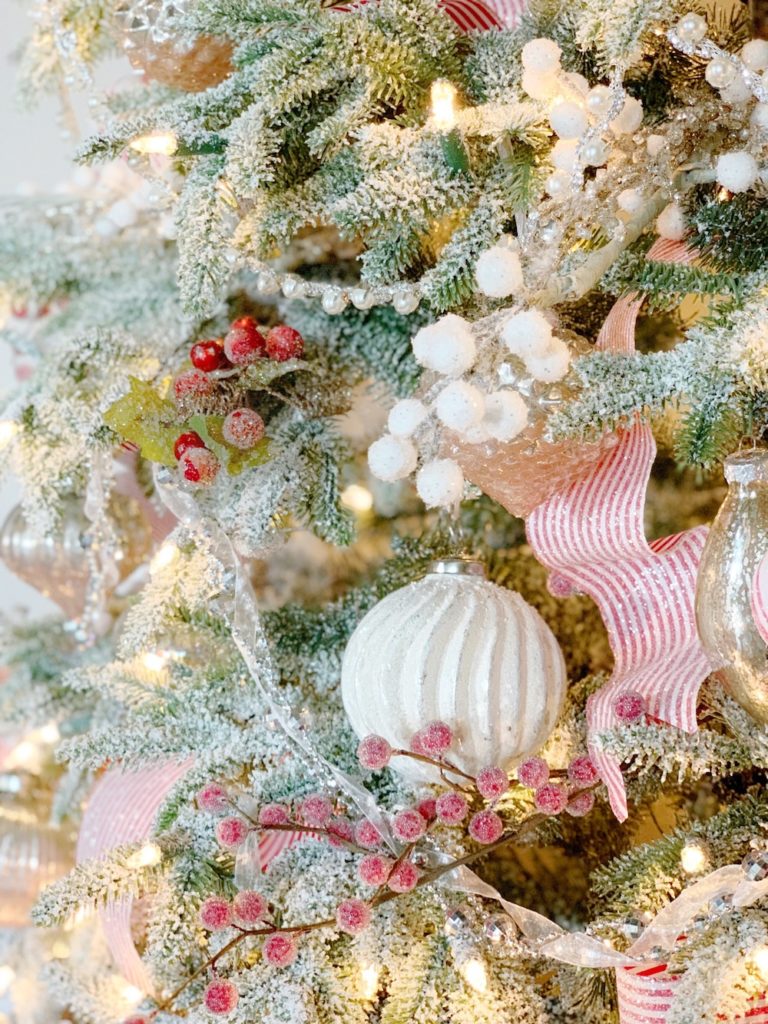
Once the large ornaments are placed, I start to place the smaller ornaments. I always try to use a variety of sizes, shapes, and textures with my smaller ornaments to create visual interest. For this tree, I used the French Country Ombré ornaments, the Silver Foil ornaments, and the Silver Crackle ornaments.
Add the Embellishments (An Easy Way to Attach Ribbon)
For the next step, I added additional embellishments to the tree such as red and white berry stems and gorgeous Crystal and Pearl picks. I also added the Royal Pearl Garland. I love how these elements give the tree a glamorous look!
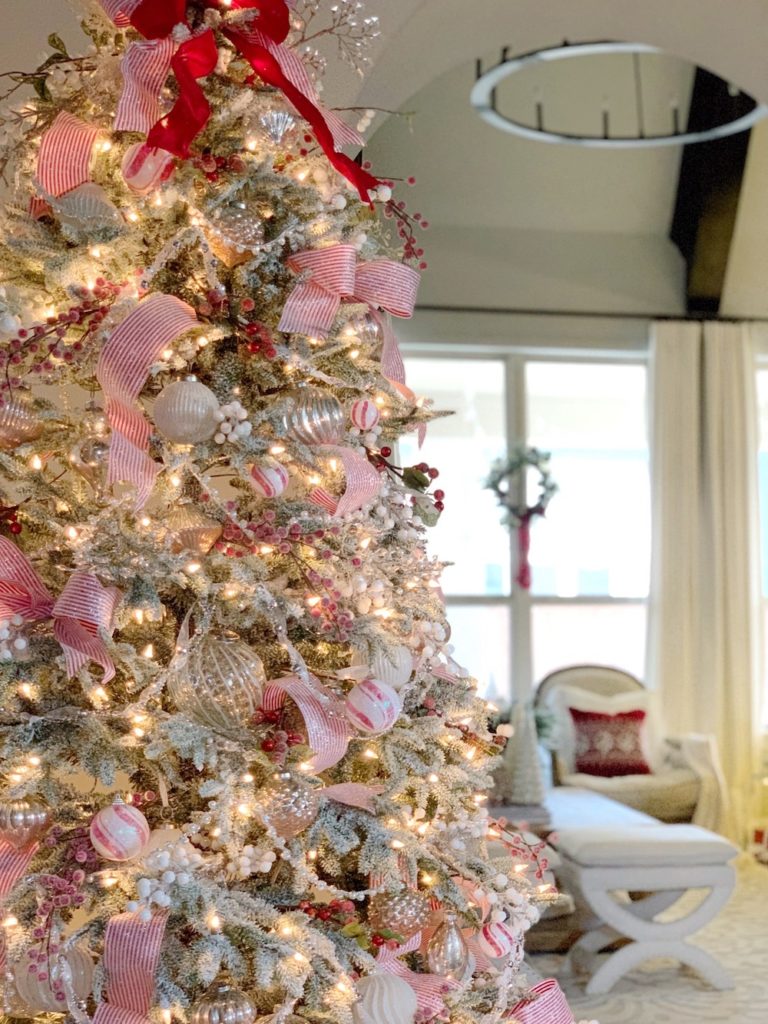
The last thing I added, and I think the most intimidating part of tree decorating, is the ribbon. Adding ribbon to a tree doesn’t have to be difficult with the trick I use. First, you need ribbon that’s wired so that you can adjust it and place it exactly where you want. I found this stunning red and white Candy Cane glittered ribbon from Balsam Hill.
To easily attach the ribbon on the tree, I cut the ribbon into pieces between 12-24 inches long. I usually cut the ends with a v-shape to give it a polished look. Then I simply tuck one of the ribbons into the tree and mold the ribbon with a curved shape to give the illusion that it is cascading down the tree. This way, you use much less ribbon and your tree isn’t overwhelmed with ribbon.
In the middle of the tree, I tuck both ends of the ribbon into the tree. I find this technique to be a quick and easy way to get the designer ribbon look.

I also added some structured bows that I created with the same striped ribbon. Since it’s difficult to tie a normal bow due to the stiffness of the ribbon, to create these bows I used twist ties around the center (see above). I created a larger bow to serve as a tree topper!

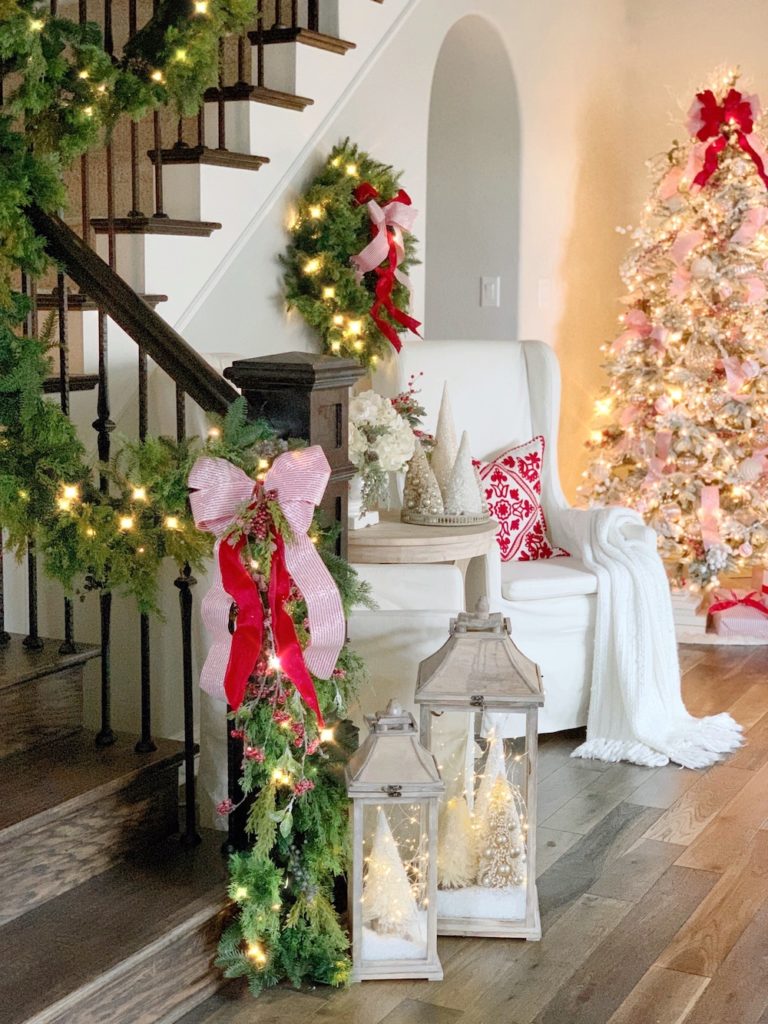
Garland and Wreaths
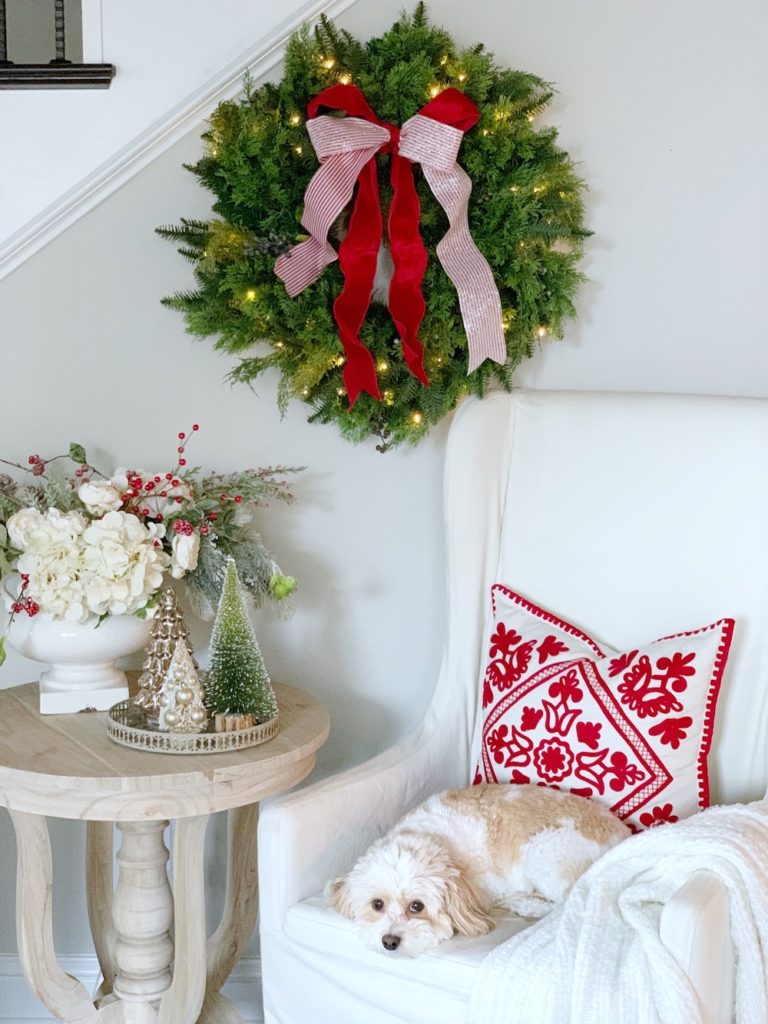
In addition to this entryway tree, I added some stunning pre-lit Juniper garland and matching wreath to my foyer space. This Balsam Hill garland is so thick and realistic! I love that it’s pre-lit with battery-operated lights. Another little trick I have is that I attach the garland to my banister using zip ties. This allows you to quickly and easily attach the garland to the railing. At the end of the season, you just have to cut the zip ties off!
Check out Balsam Hill’s Ultimate Guide to Wreaths and Garlands here.


I hope these step-by-step instructions help to make the tree decorating process much easier for you. I would love to hear about your tried-and-true Christmas tree decorating tips and tricks that you use in the comments below! Thanks for stopping by!
~ Erin

As the founder of home decorating blog My Texas House, Erin is passionate about transforming homes and decorating on a budget. With her farmhouse-chic style and penchant for clean lines, she inspires her audience with practical tips to beautify their homes.


